At the time I was making the seat for one of my granddaughters’ rocking chairs, I received a commission and had to set the chair aside for the time being. Because I had already spent considerable time on the seat and didn’t want to risk storing it in a vulnerable location, I set it on top of a tall metal filing cabinet in the finishing room. A few weeks later while working on the other project, I heard a noise that sounded like a loud clap. I thought that something had fallen from the workbench. I looked all-around and found nothing. Given that my hearing is impaired, I didn’t know for sure where the sound came from so I continued what I was doing. After completing the commission, I retrieved the seat and to my shock saw that it had cracked. The instant of separation is what I had heard.
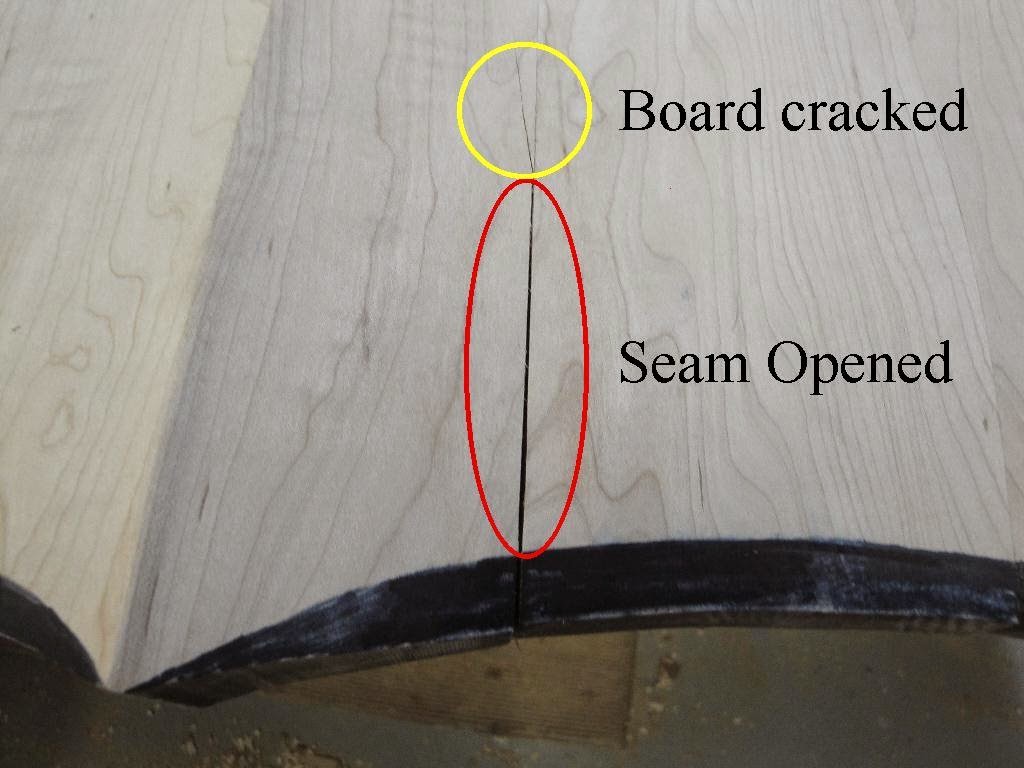
I had a sickening feeling in my gut. When I remembered that Hal had once mentioned that “anything can be repaired,” I took that to heart and then began to mull over “how” in my mind. I knew that there was no way to glue and clamp; the same stress(es) that caused the separation in the first place would still be there. After considerable deliberation, I placed the seat on the table saw and cut through the crack.
(Double taping a guide board to the seat top created a straight edge
to track along the table saw fence.)

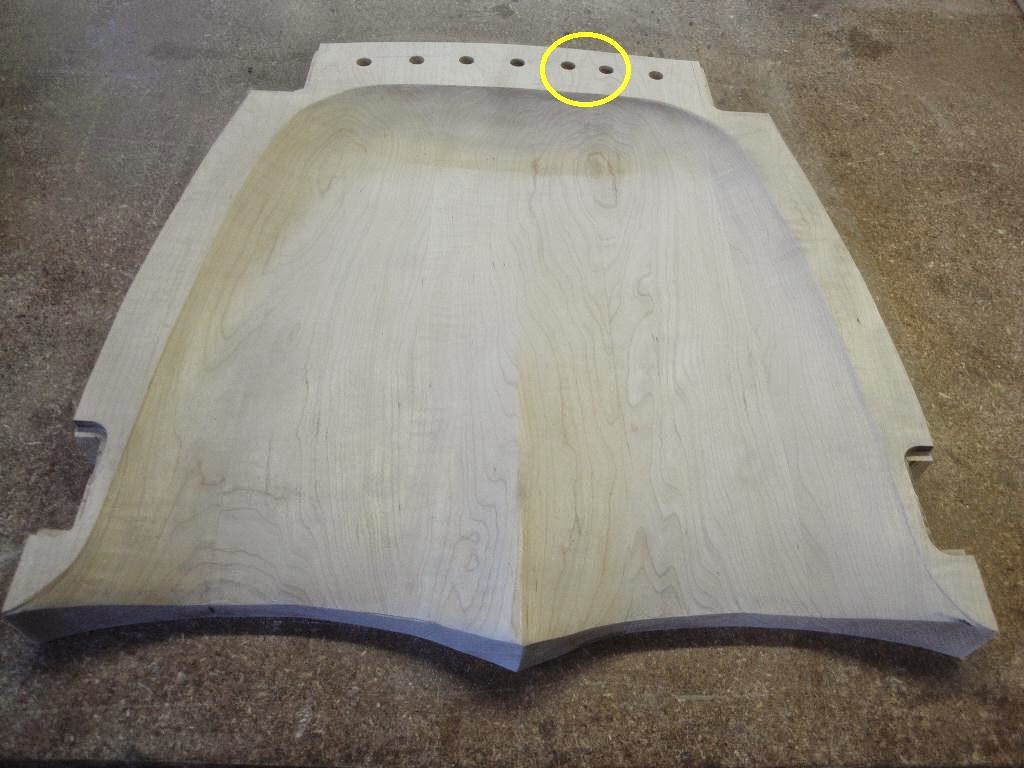
After planning, I re-glued the parts and was pleased with the result. After removing the clamps, I saw that the spindle holes on either side of the crack were now closer together. In successfully repairing the crack I had created another challenge: how was I going to deal with the possibility of having two of the spindles too close to one another.
My first attempt resulted in routing a groove in the spindle area and making a contrasting Walnut insert to fill the void. I then re-drilled the spindle holes and inserted the spindles. Yuk! I didn’t like the result at all.
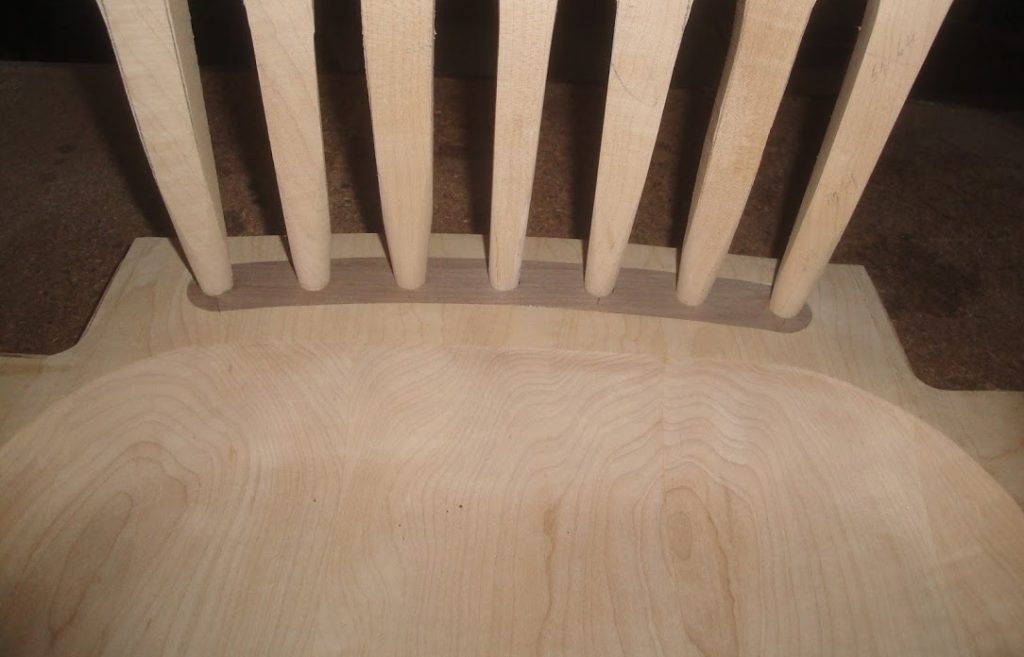
The contrast of the Walnut against the Maple in this instance would draw attention to the area. In my mind that was unacceptable aesthetically. Because I had only dry-fitted the Walnut insert, it wasn’t difficult to remove it. I then duplicated the shape in Maple, rounded-over the top edges, made it an eight-inch thicker and tested once again. And to my delight, it worked in that it looked intentional to have a raised area given all the curves in the chair. Even better, it was hard to see even when standing close. After top- coating with Watco Danish Oil Finish, the grain pattern in the Maple made for an excellent blend. I’m still not sure if “anything can be repair” but at least, in this instance, the seat could.
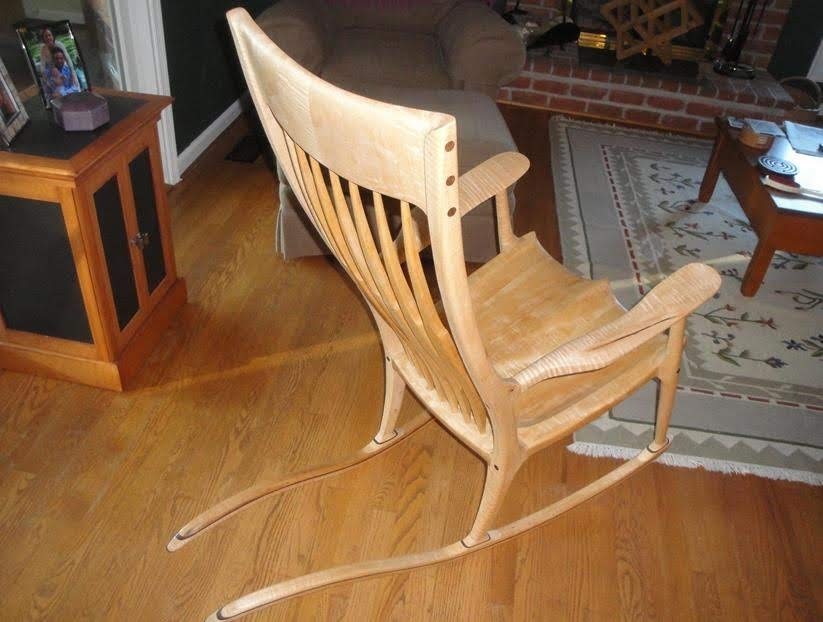
Additional Photos